 All
coal forges have one feature in common
All
coal forges have one feature in commonHow to plan and layout a new blacksmith's coal forge design
[Home] [Back To Forge Design] [Blowers, Bellows, Firepots, & Hearths] [Chimneys] [Steel Hoods] [Side Blast Forge Tuyeres] [Planning Layout of Hearth] [Steel Side-draft Forge and Hood Plans] [Costs To Build]
Understanding the fire is key to forge design
All coal forges are designed around the 'heart' of the fire. If you don't know what is meant by 'heart' of the fire than stop right there and learn how the blacksmith's fire is used. See my Using the Fire pages linked at http://www.beautifuliron.com/thefire.htm. Use and care of the blacksmith's fire, must be thoroughly understood before beginning to design the forge. Failure to understand how the fire is used will result in design of an inferior and possibly unserviceable coal forge.
Updated September 16, 2019. This page will be split soon to focus on its original subject and moving the discussion of brake drum forges and a more appropriate beginners recommendation to another area of this website. A lot of work is needed for everything on this page so expect a large amount of change. This page is under a huge transformation to make it easy and fast reading. I know that the text is currently long and rambling and mixed up. What you find on this page is a large work in progress, and you see it as I write it. Due to numerous computer crashes that also resulted in loss of backed up work as well, I also save my unfinished updates and changes directly to this website as they are made. 4 years ago I began this website and had no idea that in that amount of time I would be no where close to writing everything I have to share on construction of forges for blacksmiths.
All
coal forges have one feature in common
The coal forge is designed entirely around the position of the fire and location of the chimney. While forges can be located anywhere in the shop, the design of the hearth and chimney must accommodate the use of the fire in a way that allows the smith to place the longest bars he is likely to use, through the heart of the fire. And the forge must be positioned within the shop to allow the smith easy access to the fire and convenient and unobstructed movement from the fire to the anvil or other tool or machine. Style and position of the chimney may possibly interfere with movement of work into and out of the fire so take care to locate the chimney out of the path of work.
First rule of forge design: The hearth or ducks nest, supports the fire in a position that places the 'heart of the fire' centered (half above and half below) at the same level as the hearth or side edges of the forge (whichever is taller) The iron that is to be heated, must pass through the center of the 'heart' of the fire when placed on the forge for heating. This rule applies to all forges whether they are side blast or bottom blast. The iron must be placed through the heart of the fire without being bent. There must never be a need to build a larger fire just to heat a bar that is held far above the heart of the fire because the sides of the forge are too tall or the fire too deep below the hearth. Larger fires consume tremendous amounts of fuel and require extra blast air. Again if you don't understand the use of the fire then see the link to the Fire page above.
How tall should the forge be built?
Rule #2: Height of the forge hearth is important. Too high and the smith must reach over the hearth with his arms raised all the time. Working with the arms raised for any amount of time gives the smith a sore back just like working at a table that built at chest height. The best height of the forge is the same height as the anvil or maybe an inch taller. Measure this by standing straight and tall and with your arms at your sides relaxed, make a loose fist and measure from your second finger joint to the floor. This measurement would be a good approximate height for the center of the heart of the fire and the hearth of the forge.
 Size
matters
Size
matters
Rule #3: Size of forge is important. This is influenced to a large extent by the style of forge. A small forge with open sides would be terribly uncomfortable to work with because fire tools won't rest on the hearth of the forge without falling off, and fuel would constantly fall off the hearth while moving work in and out of the fire. On the other hand a small enclosed forge would work well for small items such as knives, chainmaking, and horseshoeing because the hood that encloses the hearth would hold the fire tools inside and also contain forge fuels within the area beneath the hood. In other words, if the forge is to be smallish say around 20 inches diameter or square, it will function well if it is enclosed, but if this small forge were to be open then it would be terribly uncomfortable and unpractical to use.
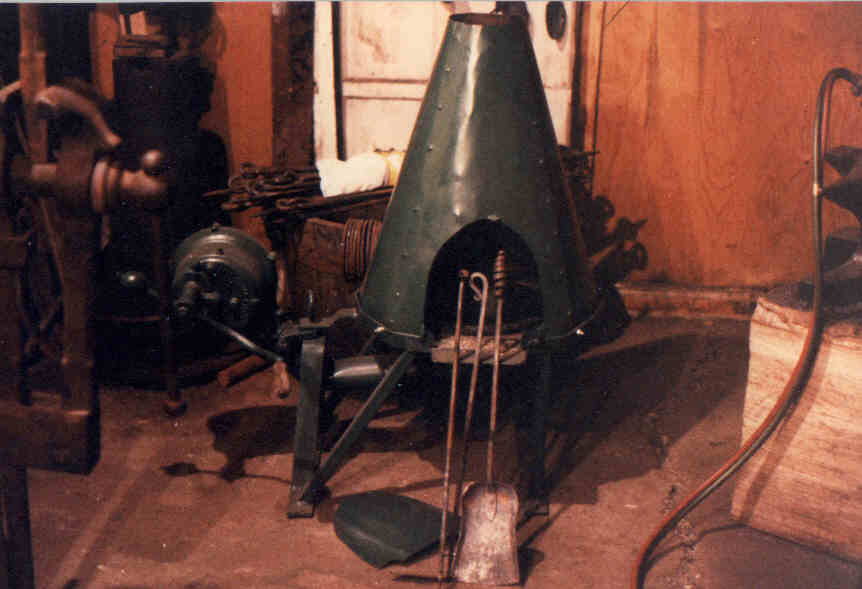
Generally the small enclosed forges are somewhat uncomfortable to use compared with a good open style shop forge. Small enclosed forges are great for portability and practical use for say, shoeing horses. Some shop forges are built small and enclosed for short bar lengths used by farriers and knife makers and chain makers. Small forges that aren't enclosed are very uncomfortable and difficult to use. Plan to build a larger forge if yours is to be set up in a shop for convenient use. At right is a photo of a small enclosed forge for making horseshoes. The small hood keeps fuel in the small hearth. But the small access opening in the front of the hood requires the smith to work from a small area in front of the fire.
Shop forges
Shop forges Under Construction
By shop forges I am referring to those coal forges that will remain permanently set up in a shop.
Rule #?: Coal and coke forges are the same forges. I have been asked repeatedly about this. All coal forges use coke fires. But not all smiths buy coke. Many smiths buy coal. This has more to do with availability of fuels in a region. The smith that uses coal, makes his own coke as part of the ongoing process of maintaining his forge fire. The fire is the same. The forge is the same. The difference is in the method that the smith must handle his fuels while maintaining the fire. All firepots are coke pots.
Beginners want to start cheap? Nothing in the blacksmith's trade comes cheap (to the beginner's point of view). Beginners always tell me that they want to spend as little money as possible, yet their expectations are for a grand awakening in the blacksmith's trade. I have received dozens of requests by friends and from many readers of this website to give them tips and ideas of how to setup their own basic blacksmith shop and find their own equipment.
What is the cost to set up a good beginning blacksmith shop?
It takes a sizeable chunk of cash to begin a shop that is capable of producing ironwork at a profit immediately. $2000-2500 U.S. will give the beginner an excellent start with the best tools. This will allow the new smith to build a good coal forge with large hand cranked blower and new firepot, a good new anvil (cheaper to buy new than used!), a set of new hammers, a good used legvise, a small amount of steel and coal, some good blacksmith books to get you started, along with various minor repair and construction costs to modify a building to be used for your shop.
Whoa, wait a minute! How much did he say it costs to start up a shop?! That's right! $2000-2500 is what I wrote. Yes I know the hobby smiths on the internet blacksmith forums are going to be in an uproar over how ridiculous they think this figure is. Sure we could try to start a shop with less then $50 and strut around telling all our internet buddies how smart we are. But skimping on tools results in a shop that can't make anything but 'S' hooks and even those wouldn't sell for a profit after we priced in our time and material inputs necessary to produce them. Leave skimping for the nitwits that hang out on internet blacksmith forums.
Investing in good tools to set up our shops allows us to focus on making ironwork and do it comfortably and efficiently before the mortar on our chimneys has finished curing. I pay several thousand of dollars a year on tooling and supplies. April of 2003 has already included a new air hammer paid for with profits from the small amount of blacksmith work I made the year before. The upgrades needed to run that new hammer will be paid for with profits from work I am currently making- for another shop that also spends thousands of dollars each year to add new tools and upgrade their own shop. Maintenance costs to operate new hammer will be approximately $5/hour. That's right- push the little green button and it's 5 bucks an hour, and that assumes the hammer will never wear out and need replacement! I haven't got time or money to buy or build junk. It costs money to make money! The blacksmith's craft is very expensive. You might spend a large amount of money from your personal living expenses to support your smithing fun, or you could sell finished ironwork to help pay for your smithing, even if only as a hobby. But pay you will.
There are a some things the new smith can do to reduce this amount of money to start a shop but it means we start with lower efficiency working in our shops. I will discuss some things to reduce setup costs later in this text, but these ideas will still need upgrading later when money allows. So you aren't sure if you will be interested in the craft of the blacksmith enough to invest this amount of money? Then attend some blacksmithing classes and see if you like it.
Add writeup here
Move the following-
What other blacksmith(?) websites recommend to beginners.
Most (if not all) other websites would have the beginner blacksmith believe that he/she can start with a 'brake drum' forge with a cheap hair dryer for a blower and a terribly overpriced broken down used anvil, and that they needed almost nothing else. The first thing visitors notice about this website, is that there are no 'brake drum forges' here. Visitors ask me why I don't have a 'brake drum forge' on my website like all the other websites. I have a number of important reasons for this and they are reasons other websites will not discuss. The websites that urge new smiths to use a brake drum to build a forge always leave out these facts.
The case against the brake drum forge.
Who recommends brake drum forges and why?
It is the owners of other blacksmiths websites that seem to be unanimous in pushing the beginner into using a forge built around a brake drum. They always give the same two foolish reasons for recommending brake drum forges to beginners. The reasons go something like this:
The central theme of the arguments these other websites offer in favor of using a brake drum in the forge design, seems to be about cost and time savings. But their is no cost or time savings when the design is more expensive in terms of monetary investment and the ability of the final product to perform competitively with forges designed by professional blacksmiths. Do the owners of these other websites really understand what they have told their new readers? The initial costs of a free brake drum compared with a $150 firepot may appear like a savings in the beginning but the brake drum will chew up a tremendous amount of capital when the construction of the forge begins, and the brake drum will never compete with a good ready-made firepot when it comes time to heat the iron. Despite their own advice, the owners of the other websites are using forges with a good firepot or tuyere designed for their forge. Beginner smiths that build the brake drum forges never question this philosophy.
When a beginner blacksmith asks me how to get a good start in the craft, I offer several answers. Compare my answers below with those of other websites.
Add full text of typical letter here
Most of the
This does NOT preclude the use of the sideblast tuyere used by many smiths. This text is only meant to show that a good ready-made firepot is the best option if the forge uses a bottom air blast design.
Been there, done that!
 Beginners
will bemoan these recommendations after reading the foolish works of other
websites, often with the statement "but I'm just a beginner" or "I don't want to
spend a lot of money". This is wasted effort. I was once a beginner too! And I
remember what it was like. 20-some years ago I was floundering around building
junk forges that wouldn't heat the iron well enough to work with. I happened
upon a magazine that printed an interview with Francis Whitaker in which he told
beginners to buy a firepot instead of wasting time with brake drum forges. After
reading the interview I decided to save my money, and soon
bought a new firepot and new hand cranked blower and a good new anvil to go
with it. My next forge was built of sheet metal and angle iron and though still
rather crude in design, it was a success. The thumbnail picture at left shows this
forge. Now I recommend the same. Buy a firepot/tuyere for your forge. To see
more of this forge click on this link and scroll down the page
http://www.beautifuliron.com/steel.htm
Beginners
will bemoan these recommendations after reading the foolish works of other
websites, often with the statement "but I'm just a beginner" or "I don't want to
spend a lot of money". This is wasted effort. I was once a beginner too! And I
remember what it was like. 20-some years ago I was floundering around building
junk forges that wouldn't heat the iron well enough to work with. I happened
upon a magazine that printed an interview with Francis Whitaker in which he told
beginners to buy a firepot instead of wasting time with brake drum forges. After
reading the interview I decided to save my money, and soon
bought a new firepot and new hand cranked blower and a good new anvil to go
with it. My next forge was built of sheet metal and angle iron and though still
rather crude in design, it was a success. The thumbnail picture at left shows this
forge. Now I recommend the same. Buy a firepot/tuyere for your forge. To see
more of this forge click on this link and scroll down the page
http://www.beautifuliron.com/steel.htm
Here is the case for using a firepot in a bottom blast forge:
Getting past the distractions
Under construction
So here is my question for you beginners that are still stuck on the brake drum forges; why do you insist on blindly following the advice of somebody else to build a brake drum forge while the people that want you to use a brake drum would not use one themselves? And knowing that you are entering a complex craft, why do you allow yourself to become distracted into using something that the best smiths in the field would not bother using themselves?
Under construction:
Forge height. The general purpose forge needs to be tall enough that the smith need not bend to reach into the fire. Neither should the forge be tall enough to require the smith to lift their arms to reach over it. Too short and the forge is awkward to work with, while too tall and the smith will develop a sore back during the days work.
Approximately same height as anvil the general-purpose forge hearth is level with the smiths knuckles or second finger joint. As an example, my forges are about 1/2 inch taller than my anvils with the actual measurement of height of hearth being about 31-1/2 tall above the floor.
To find the height suitable for your own general forge, stand straight and tall, form a loose fist, measure to a point from the floor to the second finger joint of your fist or to your knuckles. Record this measurement and plan for this dimension in your forge design so that the top surface of the hearth is level with your measurement. The height of any sides or edges around your forges hearth are not part of this measurement. At this time we are only measuring for the height of the hearth.
Blower height. If the forge uses a hand cranked blower, the blower is mounted in a way that allows the crank handle to come no lower (while revolving in its circular travel path) than the inside of the smith's fist when he is standing straight and tall next to the forge. In other words the smith should never need to bend at any time while cranking the blower handle around its entire circular path.
Never mind the final height of the forge. What is important in mounting a blower is that the smith need not reach too high or too low while cranking the blower. Reaching too low is worse than reaching a bit high so we calculate height of crank handle from its lowest position.
Measuring for blower height. Cut off a piece of broom handle or obtain a short piece of hammer handle to use as a reference for measuring your height of grip. Grasp the temporary handle with your left hand (it doesn't matter if you are left or right handed at this point in time) and stand straight and tall with your arm relaxed and straight down by your side. Measure from the floor to the center of the piece of handle in your left hand. Record this dimension. This is the lowest point through which the blower crank handle will be allowed to pass as it is rotated to operate the blower. All methods of mounting or positioning the forge blower must allow for the center of the crank handle to reach this height dimension as it rotates through its lowest point of travel.
Lateral positioning of blower. The blacksmith needs room to work between the blower crank handle and any long bars of iron extending out of the forge. If the blower is placed too close to the fire laterally then there is no room to stand between the blower and any long bars of iron that are extending over the side of the forge as they are being heated, and the smith would then be forced to reach over the iron bars to crank the handle of the blower.
Hand-cranked blowers are heavy. Blowers are usually made of cast iron and are heavy and can cause many small forges to overbalance and tip over when the blower is mounted far from the fire. That is the reason the blowers on most ready-made cast iron forges are mounted close to the hearths. The new smith often uses the ready-made manufactured forge as his example of construction technique and places his own blower too near the forge hearth. I am cautioning the new forge builder to avoid mounting the blower so close to the forge as it causes problems later during use. However the new smith will need to consider how the weight of good cast iron blower may overbalance his forge and cause it to tip over under certain circumstances.
There are a number of solutions to overbalancing problems for blower mounting.
The smith needs room to stand either between the blower and any long bars extending out of the fire, or in front of the blower and next to any long bars in the fire. In setting up placement of the blower, the smith always assumes there will be a hood or chimney on the forge at some time. The two best positions to mount the blower are as follows:
Special purpose forges are of many different heights depending on the work they perform and methods of using them. I have seen examples of an anvil forging shop from Germany in which the forge hearths were about 9 inches above the floor and very large to accommodate the large amounts of fuel to heat the parts of anvils for forging. But cranes and other lifting devices were used to move the parts in and out of the fire and it is easier to shift large shovels full of coal onto a low platform than a high one. The height should best suit the work and the methods of using and servicing the fire.
Plotting Chimney Position
A plumb bob is used to find the ideal position for both the chimney base at floor level and also the position in the roof where the chimney must exit. The plumb bob string is held against the roof or ceiling at each point or corner of the area on the roof that the smith thinks he will cutout for the chimney. Moving the plumb bob string around until the best area is located both at floor and ceiling level. Mark both the floor and roof at these points so the chimney can be constructed on this location. Tack nails at each corner of the proposed cutout in the roof to tie the string of the plumb bob onto before making marks on the floor.
Chimney position dictates position of the forge! Understand this point before making any alterations to the shop. The physical area or 'footprint' of the lower chimney structure directly influences where and how the forge hearth is built The chimney flue should be built as straight as possible from bottom to top. This is especially important if the chimney is made of brick or stone because a tilted or bent masonry chimney will eventually break or fall down. To take this a step further we find that when we follow a masonry flue structure down from roof level to the forge, we find the lower structure of the chimney always occupies the area directly underneath the flue. Obviously the base of the chimney and the forge itself take up more area on the floor level but keep in mind that the flue structure is straight and will take up area directly beneath the chimney for a base to support the weight of the chimney flue.
Since the chimney is often larger and of much larger shape at floor level compared with the shape of the chimney where is exits the roof, the blacksmith must be careful to note the exact location of the plumb bob string at floor level and compare with his/her final forge plan to determine if the full chimney base will fit in the location marked out with the plumb bob. The position of the base of the chimney may not be compatible with the position of the flue structure as originally marked out on the floor, so be ready to adjust or move the forge plan around until it fits. Also keep in mind that the forge plan can still be changed at this point too. When the smith is satisfied that the final forge plan fits the location and that there is enough room for a chimney flue to pass through the roof, then final marks are made on the floor for construction.
Things that effect the position of the forge
Hood and chimney supports, air blast pipes, bellows and pull ropes, blowers and blower mounts or stands, draft breakers, cleanout holes in the proposed forge, and anything else mounted between the forge and any nearby walls or walkways or tool racks may force the smith to either modify his/her forge plan or build it farther out into the workshop area then originally anticipated.
What is work to be done (small ornamental work/gates, short rails for our purposes)? This effects rough position in shop.
How large? For placing large amounts of coal, tools and some parts on hearth.
How many fires?
Chimney materials (brick or stone, steel pipe)?
Side draft or overhead hood?
Type of hearth (steel-welded angle plate and pipe, steel bolted or riveted, angles, plate or sheet iron, wood and cinder, concrete, masonry or stone, refractory brick)?
Here we break the discussion into four categories, the brick side-draft forge, large overhead hood, the half hood, and the conventional large hood. And the retrofit hoods such as my steel sidedraft hood and large conventional hood.
Updated on September 16, 2019.
This page under construction and lots more to be added.
The author can be emailed at address in picture below:

Page created on October 15th, 2001.